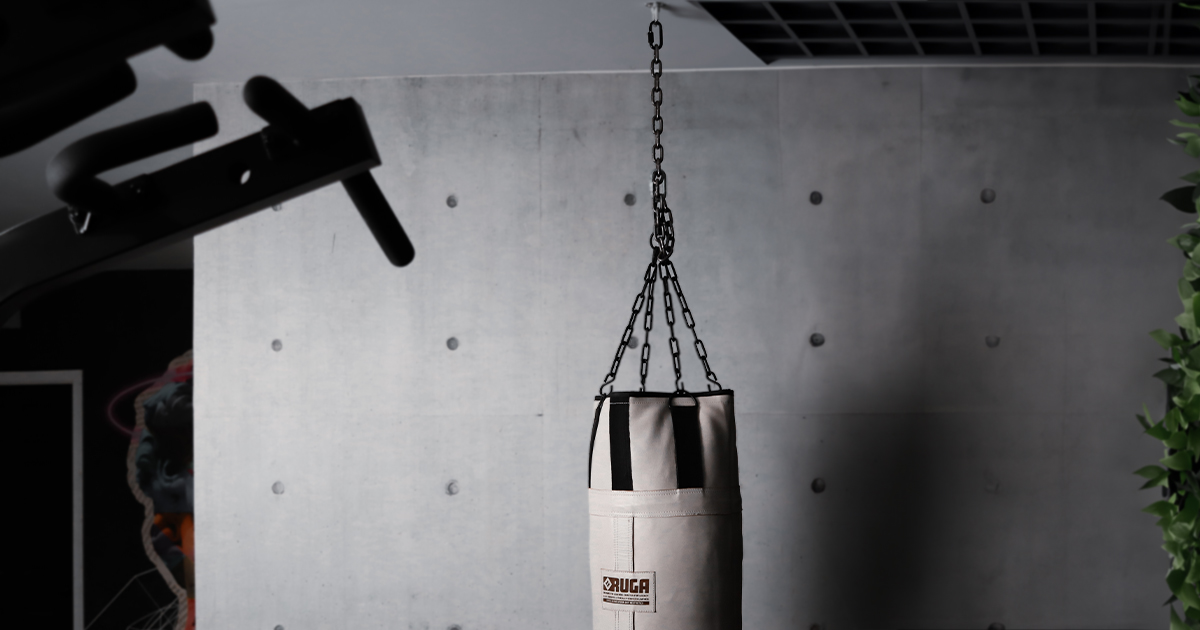
Mounting a punching bag properly is crucial not only for your safety but also for the effectiveness of your workouts. Whether you’re setting up a bag at home or in a gym, understanding the correct installation method for different types of mounts can enhance your training experience and help protect your equipment. This guide will walk you through the steps to mount your punching bag to ceilings, walls, stands, and beams, ensuring sturdy and reliable setup.
Table of Contents
- Introduction
- Choosing the Right Mount for Your Punching Bag
- Tools and Materials Needed
- How to Mount a Punching Bag to the Ceiling
- Locating a Joist
- Installing the Mount
- How to Mount a Punching Bag to the Wall
- Choosing the Right Wall
- Securing the Bracket
- How to Use a Punching Bag Stand
- Assembly
- Placement
- How to Hang a Punching Bag from a Beam
- Finding a Suitable Beam
- Attaching the Bag
- Essential Accessories for Punching Bag Installation
- Final Checks and Safety Tips
- Conclusion
Introduction
Before mounting your punching bag, it’s important to decide on the location and type of mount that best fits your space and workout needs. Each type of mount offers different benefits and challenges, which we will explore in this guide.
Additionally, ensure your punching bag is properly filled and prepared for hanging. If you need guidance on how to fill your bag, check out our detailed article on the Top 3 Ways to Pack an Unfilled Punching Bag.
Choosing the Right Mount for Your Punching Bag
- Ceiling Mount: Best for a permanent, stable setup. Ideal if you have high ceilings and want to maximize floor space.
- Wall Mount: Good for areas with limited ceiling height. Requires a solid wall that can bear weight.
- Punching Bag Stand: Versatile and movable. Ideal if you cannot or do not want to drill into walls or ceilings.
- Beam Mount: Utilizes existing beams. Perfect for open beam basements or garages.
Tools and Materials Needed
- Drill
- Stud finder (for locating joists or beams)
- Wrench set
- Screwdriver
- Heavy-duty screws and bolts
- Mounting bracket (specific to wall or ceiling mounts)
- Chain or durable straps
- Punching bag spring (optional, for reducing noise and vibration)
How to Mount a Punching Bag to the Ceiling

Locating a Joist
- Use a Stud Finder: Run a stud finder across the ceiling to locate a joist where you’ll mount the bag.
- Mark the Spot: Once you find a joist, use a pencil to mark where you’ll drill.
Installing the Mount
- Drill Pilot Holes: At the marked spots, drill small pilot holes into the joist. Ensure the holes are the right size for the screws that will secure your mount.
- Secure the Mount Bracket: Align the mounting bracket over the pilot holes. Use heavy-duty screws to secure the bracket to the ceiling joist.
For those who are looking for a reliable mount, we recommend a mount found on Amazon. It’s an iron mount with a 600 lb. weight limit, featuring a 360-degree swivel, which is perfect for dynamic workouts. The mount comes with all the necessary screws for either concrete or wood, ensuring an easy installation process. Remember to always follow the manufacturer’s instructions for the best results.

Iron Punching Bag Mount: 600 lb. Limit & 360° Swivel – Ideal for Ceiling Mounts - Attach the Bag: Hook the chain or strap to the bag and then attach it to the mount. If using a spring, attach it between the mount and the chain.
How to Mount a Punching Bag to the Wall
Choosing the Right Wall
Inspect the Wall: Ensure the wall is solid, ideally concrete or masonry. Avoid drywall-only sections which are not designed to bear significant weight.
Locate Studs: Use a stud finder to locate studs in the wall for additional support, which is critical for the stability of the mount.
Securing the Bracket
Mark and Drill: Mark the drill points over the studs. Drill holes and insert wall plugs if using masonry. If mounting into studs, ensure you use the appropriate length of wood screws.
Attach the Bracket: We recommend the robust 800 lb weight limit wall bracket for those looking for a reliable option. This adjustable-length bracket is designed for heavy-duty use and comes with a complete kit suitable for wood and concrete installation. Line up the bracket, then screw it securely into the wall using the provided screws.

Heavy-duty, adjustable wall mount bracket, supporting up to 800 lbs. Hang the Bag: Attach the bag using a chain or strap to the bracket. Consider including a spring to reduce impact stress on the wall, which is especially beneficial when using a heavy-duty mount like this one that supports up to 800 lbs.
How to Use a Punching Bag Stand
Assembly
- Assemble the Stand: Follow the manufacturer’s instructions to assemble the stand. Ensure all screws are tightened. For those in need of a stand that is versatile and can be moved easily, RUGA recommends this floor mount stand found on Amazon. It’s portable and offers an adjustable height, making it ideal for spaces that cannot accommodate a ceiling or wall mount. With a weight limit of 132 pounds, it can handle most training sessions. To assemble, follow the manufacturer’s instructions closely, and make sure all screws are tightened for stability. Its convenient fold-up design allows for easy storage when not in use.

Placement
- Position the Stand: Place the stand in a desired location, ideally on a level, stable surface.
- Attach the Bag: Hang the bag from the hook provided at the top of the stand.
How to Hang a Punching Bag from a Beam
Finding a Suitable Beam
- Locate a Beam: Use a stud finder or visually inspect your space to locate an exposed beam that’s sturdy enough to support the weight of your punching bag. It’s important to ensure the beam can handle dynamic loads, as a punching bag will create stress due to the swinging motion.
Attaching the Bag
Option for Heavy-Duty Mount: As an alternative to straps, you could also opt for a mount like the one recommended for ceiling installations. This heavy-duty iron mount is capable of supporting up to 600 pounds and includes a 360-degree swivel, which is ideal for a punching bag setup. The swivel allows the bag to rotate freely, reducing wear on the straps and the beam itself.
Secure the Mount or Straps: If using the recommended mount, attach it directly onto the beam following the same process as a ceiling installation, using the provided screws for wood. If using straps, wrap durable straps around the beam and secure them with a heavy-duty buckle.
Hang the Bag: Whether using the mount or straps, hang your punching bag using a chain or hook. If you’re not using the mount with a built-in swivel, consider including a separate spring to absorb shocks and reduce noise—this will add longevity to both the mount and your punching bag.
Essential Accessories for Punching Bag Installation
When mounting a punching bag, there are a few additional accessories that can be critical for a secure and functional setup. These accessories ensure that your punching bag hangs at the right height and has the mobility necessary for a good workout.
Extension Chain with Carabiners
An extension chain may be necessary if your punching bag hangs too high or if you require additional distance from the mounting point for better range of motion. We recommend a durable extension chain available on Amazon. It’s 22 inches in length, and when including the 2.8 inches for each carabiner, you get a total length of 27.6 inches. This chain is sturdy, supporting up to a 400-pound weight limit, which accommodates most punching bags comfortably.

Carabiner Width Consideration
If you’re using the RUGA Weave Warrior punching bag, or any other bag with a thicker rope, you may need a wider carabiner to ensure a secure fit. It’s important to check the width of your punching bag’s rope to select a carabiner that can accommodate it. The recommended extension chain includes carabiners that are suitable for most punching bags, making it a versatile choice for your setup.
By incorporating these accessories into your punching bag installation, you can adjust for height, increase the bag’s swing range, and ensure compatibility with various bag types. This attention to detail enhances your training sessions by allowing you to focus on your workout with the assurance that your equipment is safely and securely installed.
Final Checks and Safety Tips
- Test the Setup: Gently pull on the bag to ensure everything is secured tightly. Perform a few light test punches.
- Regular Inspections: Periodically check all connections for wear and tear, tightening any loose bolts or screws.
- Proper Clearance: Ensure there’s ample space around the bag to safely train without hitting walls or other objects.
Conclusion
Properly mounting your punching bag ensures safety and improves your training effectiveness. Whether you choose a ceiling, wall, stand, or beam mount, follow these detailed instructions to create a durable and stable setup. Remember to refer back to our guide on how to fill your punching bag to ensure it’s ready for action. Enjoy a safe and productive training environment where you can hone your skills and increase your strength.
This guide not only provides thorough instructions for various installation methods but also integrates seamlessly with additional resources, making it a comprehensive toolkit for anyone looking to set up their punching bag with confidence.
FAQ'S
For heavy punching bags, it’s best to use a ceiling mount or a wall mount designed for heavy loads. Ensure the mount has a weight capacity that exceeds the weight of your bag, and it’s securely installed into a support beam or concrete wall.
Mounting a punching bag directly to drywall is not recommended, as it cannot support the weight and motion of a bag. Always mount to a stud, joist, or use a wall mount bracket that distributes the weight across multiple points of support.
The bottom of the punching bag should hang approximately 2 feet above the ground. However, this can be adjusted based on personal preference and the type of training you’re doing.
Yes, you can use a free-standing punching bag stand that doesn’t require drilling. These stands are adjustable, portable, and ideal for locations where drilling is not an option.
You can determine the strength of a beam by ensuring it is a load-bearing structural element. If unsure, consult with a structural engineer or professional installer. Using a stud finder can help identify the central location of the beam for the most support.
Regularly check all hardware for tightness and wear. If you have a mount with a swivel, lubricate it occasionally to prevent squeaking and ensure smooth movement.
Yes, a punching bag can be installed on a brick wall using a suitable wall bracket and hardware designed for masonry. Make sure to use masonry anchors and screws for a secure installation.
If a ceiling mount starts to loosen, stop using the punching bag immediately. Remove the mount and inspect the ceiling for damage. You may need to relocate the mount to another joist or reinforce the area before remounting.
For outdoor installations, choose mounts and hardware that are corrosion-resistant to withstand the elements. Also, consider a cover for your punching bag to protect it from weather damage.
To reduce noise, use a spring or rubber dampeners where the bag attaches to the mount. Ensure all components are tightly secured, as loose parts can cause additional noise.


 No products in the cart.